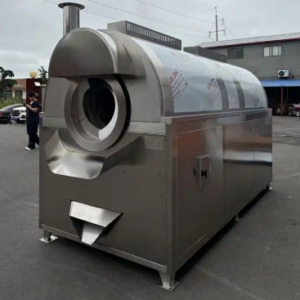
How to Clean a Twin-Screw Extruder for Puffed Snack Production
Cleaning a twin-screw extruder is a critical step in maintaining its performance, ensuring food safety, and prolonging its lifespan. Proper cleaning prevents cross-contamination, removes residues, and ensures the machine is ready for the next production run. Below is a step-by-step guide on how to clean a twin-screw extruder effectively.
1. Preparation for Cleaning
Before starting the cleaning process, ensure the extruder is safely shut down and cooled to avoid burns or injuries. Gather the necessary cleaning tools and materials, such as:
- Food-grade cleaning agents
- Brushes and scrapers
- Clean water or steam
- Protective gloves and goggles
- Cleaning cloths or sponges
2. Shutdown and Depressurization
- Stop the machine: Turn off the extruder and disconnect it from the power source.
- Depressurize the system: Allow any remaining pressure in the barrel to release by opening the die or venting ports.
- Remove residual material: Run the extruder briefly with a cleaning agent or purge material (e.g., cornmeal or rice flour) to push out any remaining product.
3. Disassembly
- Remove the die and cutter: Carefully detach the die and cutter assembly. These parts often accumulate the most residue and require thorough cleaning.
- Extract the screws: Open the extruder barrel and remove the twin screws. This step may require tools and should be done carefully to avoid damaging the components.
- Detach other removable parts: Take apart any additional components, such as feed hoppers, seals, and sensors, that need cleaning.
4. Cleaning the Components
- Scrape off residues: Use scrapers or brushes to remove any hardened or sticky material from the screws, barrel, die, and cutter.
- Wash with cleaning agents: Apply food-grade cleaning solutions to dissolve grease, oil, and food residues. Use brushes or sponges to scrub all surfaces thoroughly.
- Rinse with water or steam: Rinse the components with clean water or steam to remove any remaining cleaning agents and residues. Ensure no cleaning solution is left behind, as it can contaminate the next batch of product.
- Dry the parts: Use clean, dry cloths or compressed air to dry all components. Moisture can lead to rust or bacterial growth.
5. Cleaning the Barrel and Frame
- Wipe the barrel interior: Use a clean cloth or brush to remove any residue from the barrel. Pay special attention to hard-to-reach areas.
- Clean the exterior: Wipe down the exterior of the extruder, including the frame, control panel, and feed hopper, to remove dust, grease, and spills.
- Inspect for wear and tear: Check for signs of damage or wear on the barrel, screws, and other components. Replace any worn parts as needed.
6. Reassembly
- Reinstall the screws: Carefully place the cleaned screws back into the barrel.
- Reattach the die and cutter: Secure the die and cutter assembly, ensuring they are properly aligned and tightened.
- Reconnect removable parts: Reinstall any additional components that were detached for cleaning.
7. Sanitization (Optional)
For added food safety, sanitize the extruder after cleaning:
- Use a food-grade sanitizer to disinfect all surfaces.
- Rinse thoroughly with clean water to remove any sanitizer residue.
8. Final Checks
- Inspect the machine: Ensure all parts are clean, dry, and properly reassembled.
- Run a test cycle: Before starting production, run the extruder with a small amount of purge material to confirm it is functioning correctly and free of contaminants.
9. Documentation
- Record the cleaning process: Document the date, time, and cleaning steps performed. This helps maintain a cleaning schedule and ensures compliance with food safety regulations.
By following these steps, you can effectively clean a twin-screw extruder, ensuring it remains in optimal condition for producing high-quality puffed snacks. Regular cleaning not only improves product quality but also extends the life of the equipment.